Idea Pins, formerly called Story Pins, are one of Pinterest’s newest pin formats.
This pin type can be a great way to reach new audiences, and they are currently very favored in the algorithm as Pinterest shifts its focus towards Pinterest Creators and monetization.
However, Idea Pins can have many benefits for businesses on Pinterest as well!
This post will show you exactly how to create Idea Pins step-by-step. You’ll hopefully leave this post as an Idea Pin pro!
Let’s dive in.
Please note: Pinterest is always changing, and while I try my best to update my posts, not all information may be up to date. If you’re looking too see the most updated tips, strategies, and information, check out this resource page.
What are Idea Pins?
Idea Pins are a multi-page pin format that allows pinners to add up to 20 pages of images or videos. These highly customizable pins are designed to help Pinterest Creators grow their audiences and monetize their content.
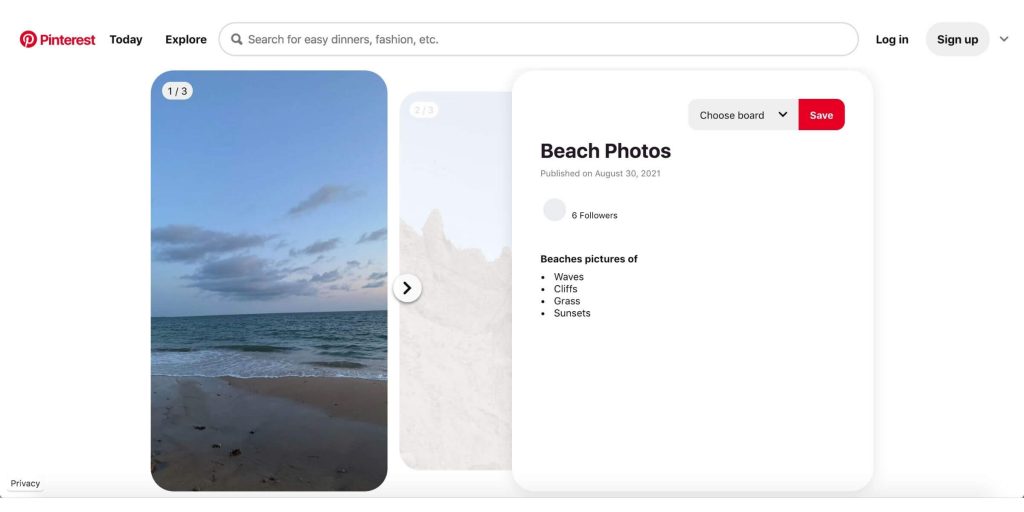
Idea Pins were formerly called Story Pins. However, Pinterest rebranded them into Idea Pins because they better fit Pinterest’s brand and mission.
As one of Pinterest’s newer initiatives, Idea Pins are very favored in the Pinterest home feed and search results. This means that it’s a great time to give them a try if you feel that they will benefit you and help you reach your Pinterest goals!
What are Idea Pins for?
With the right strategy, Idea Pins can be used for a lot of different things!
For instance, Idea Pins can be used for:
- Promoting products – Since you have the ability to tag products on Idea Pins, Idea Pins can be a great place to promote products! You can link to products on Etsy and other popular shops, and you can of course promote most of your own products too! Plus, they don’t even have to be your own products – you can also promote affiliate links on Idea Pins!
- Driving traffic to a website – While Idea Pins are certainly not as great as Standard Pins and Video Pins in terms of traffic, you can still get viewers from your Idea Pin to your website (such as saying “Click the link in my bio!”). Later on in this post I will mention something crucial that you should NOT do to get traffic with Idea Pins.
- Brand awareness – Idea Pins are heavily favored in the algorithm, so they can be great for getting your content in front of new viewers and growing brand awareness. To convert viewers into followers, buyers, readers, etc., try using some call to actions!
- Growing an audience – Idea Pins can be really great for engagement and growing a loyal audience, especially if you want to become a Pinterest influencer! Create inspiring content that others want to see and you can see really great results! To know what’s popular on Pinterest, be sure to do keyword research.
Who can create Idea Pins?
Users with a Pinterest business account or a personal account can create Idea Pins.
If you own a business or are looking to grow on Pinterest, I highly suggest creating a free Pinterest business account because you get access to exclusive tools such as in-depth Pinterest analytics.
If for some reason you do not see the option to create Idea Pins or live in a region where they may not have been rolled out yet, you can try to request access here.
Related: Should You Have A Personal Or Business Pinterest Account?
Who should create Idea Pins?
Idea Pins have certainly been a controversial Pinterest topic, especially for bloggers.
I personally have mixed feelings about it. Currently, I would suggest that bloggers do not create Idea Pins for the reasons in this post.
However, this is something I want to learn about and experiment with myself so I can have a better understanding.
Differences between Idea Pins and other pins
Besides their advanced customizability and multiple slides, there is one very notable difference between Idea Pins and other pins: you can’t include links on Idea Pins.
With Standard Pins and Video pins, you are able to include a link to an external source (like a blog post), and users can then click that pin and go to the URL.
On Idea Pins, you can’t.
This is one of the main reasons that many bloggers do not like Idea Pins. Essentially, they don’t do too much for traffic.
And even when you are able to convert an Idea Pin viewer to a reader, it will likely be through the link on your Pinterest bio. Then, the reader will have to navigate to find the post they want to read.
How to create Idea Pins
Please note: For this tutorial, I am going to show you how to create Idea Pins on the mobile Pinterest app. The reason for this is that the Pinterest app currently has many more editing and customization tools than desktop (and as I mention in my top Idea Pin tips, Pinterest seems to want you to use these features). I create nearly all of my Idea Pins on mobile.
If you are like me and like to use design platforms such as Canva to create graphics, you will just need to be able to get your graphics to your phone. I will often download my Idea Pins straight from the Canva app, but you could also email them to yourself or find some alternative way!
If you would like to create an Idea Pin on desktop, go to Create > Create Idea Pin and go from there.
1. Click the “+” sign in the toolbar at the bottom of your screen and click “Idea Pin”
The toolbar should look like this:

Then, click “Idea Pin.”
2. Upload your content
Click the box in the bottom left-hand corner of your screen. This will bring you to your photo album, where you can select which content you want to add to your Idea Pin.
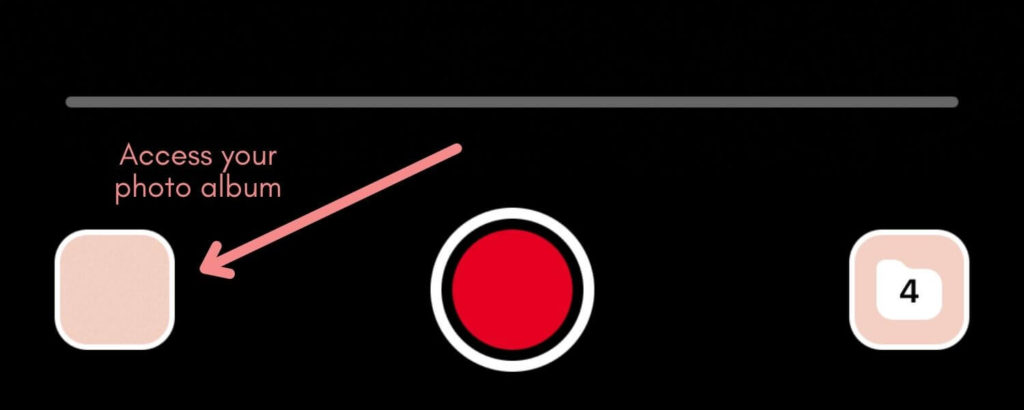
You can add both photos and videos to your Idea Pin.
Select your content in the order you want it to appear on the Idea Pin. (You can easily change this later if you change your mind!)
3. Customize your Idea Pin
Scroll and select the slide you wish to customize!
As you’ll see at the bottom of the screen, there are SO many things you can do.
To name some, you can:
- Add text
- Add music
- Add a voiceover
- Add filters
- Add stickers
- Zoom in and out on your image
- Tag products (including affiliate links)
- Tag other Creators/accounts
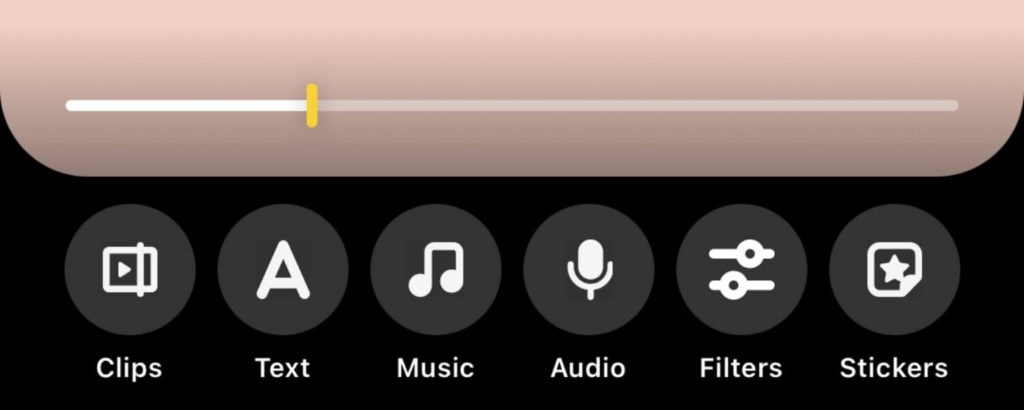
This post would be sooo long if I went through how to do each thing, so I’ll keep it short and sweet.
However, I highly recommend experimenting around!
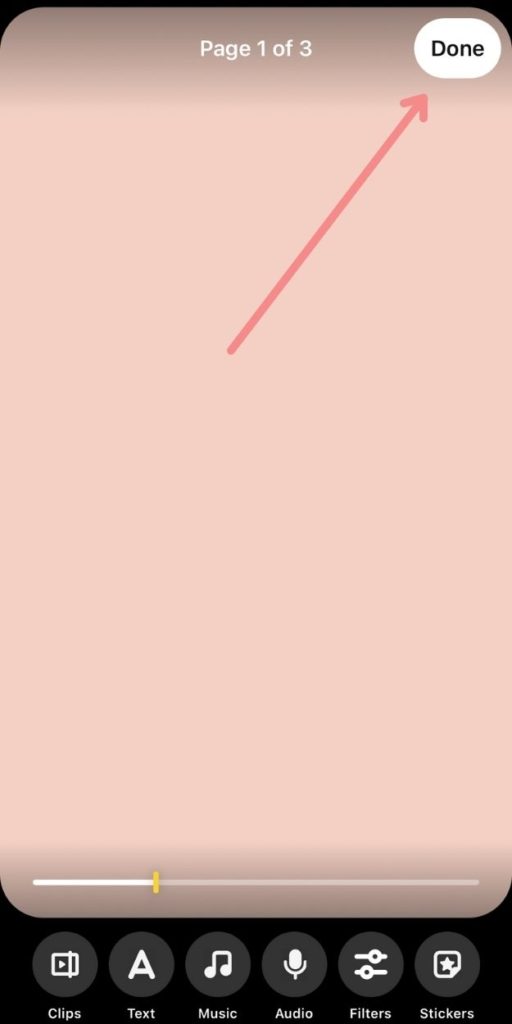
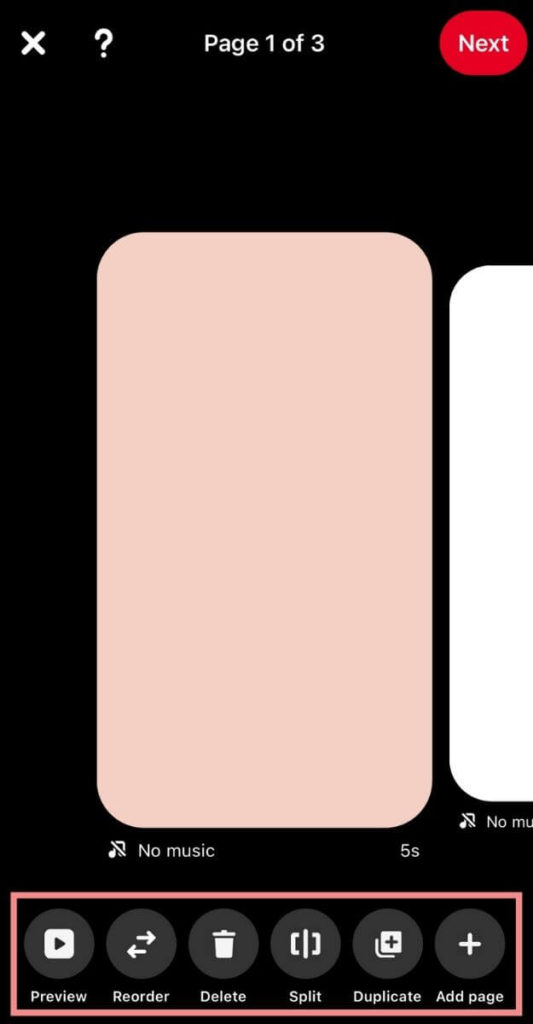
Once you click “Done” on a slide, you can see all of the slides of your Idea Pin.
At the toolbar on the bottom of the screen, you can also do things like reorder pages, delete pages, duplicate pages, add pages, split pages, and preview your Idea Pin!
4. Preview your Idea Pin
I always try to preview my Idea Pins before publishing them.
The worst thing is when you publish an Idea Pin and realize part of your content is covered!
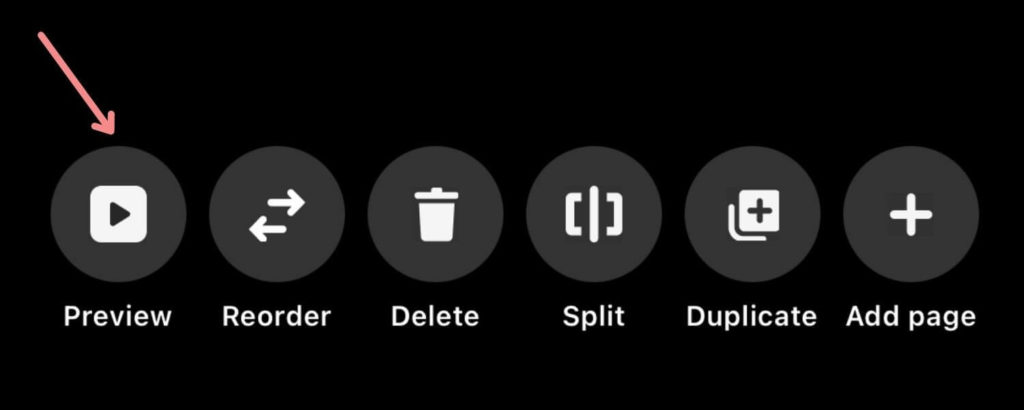
To preview your Idea Pin, go to the page where you can see all of your slides and click the “Preview” button on the left of the bottom toolbar.
On this screen, you can see a preview of what your Idea Pins will look like to other users. This is great because you’ll be able to see where the text and engagement buttons will be so you can make sure your content won’t be covered!
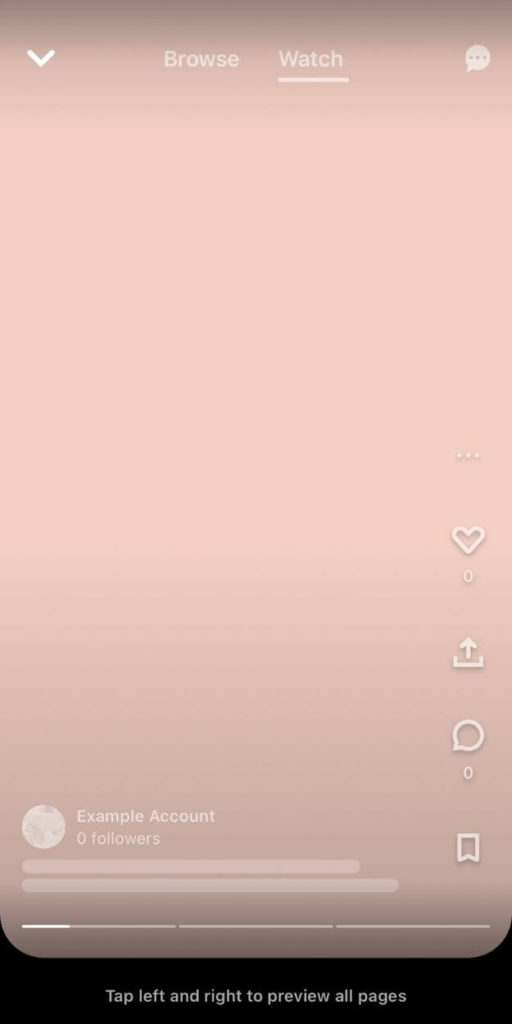
5. Optimize your Idea Pin
Once you’re ready to move forward, click “Next” in the upper right-hand corner of the screen. This will take you to the “Finishing touches” pages.
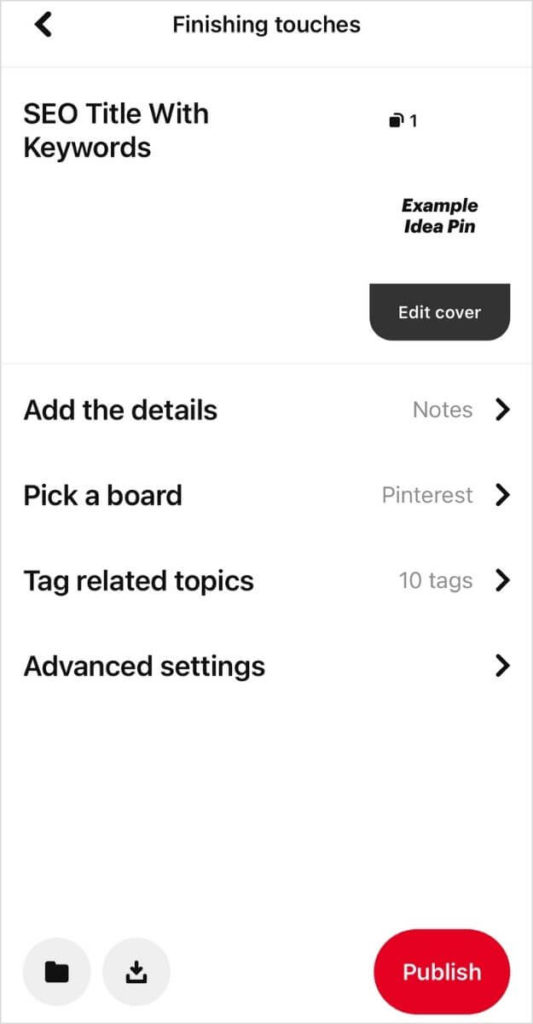
I highly suggest that you fill out as much as you possibly can here. Pinterest will use parts of this information to understand what the pin is about, and optimizing for Pinterest SEO is really important (so include Pinterest keywords)!
Here’s what I suggest you do:
- Add an SEO optimized pin title – Pinterest pulls keywords from the pin titles in order to understand what your content is about. Be sure to create an accurate pin title with keywords to help your pins hopefully be distributed in the home feed, rank in Pinterest search, and more!
- Add details – Adding details can be great to improve your user experience and may help with SEO. Provide information about your Idea Pin or the topic! Plus, I think this is a great place to add a call to action. I usually end up using Notes because my content doesn’t usually include Ingredients or Supplies. However, pick the one that is best for you!
Important: Although it may seem like a good idea, do not add a link to a URL in your Idea Pin details (or at all)! Pinterest supposedly suppresses Idea Pins with URL (since the point of them is to keep users on the platform).
- Select the most relevant board – When selecting your board, be sure to select the most relevant board to your Idea Pin topic. This is very important because Pinterest will use this to further understand your pin. Also, make sure the board is optimized for Pinterest SEO! You can read my Pinterest board SEO guide here.
- Tag 10 related topics – Related topics are another thing Pinterest uses to understand what a pin is about. If you can fill all 10 topics, do it. Try to pick the most relevant topics, but they may not match identically.
- Allow comments and takes – Enabling comments and takes is good because it opens the door to additional engagement opportunities. As you may know, engagements on pins are a huge indication of how “good” a pin is, and it may help your pin to get more distributed. (You can do this in “Advanced Settings”)

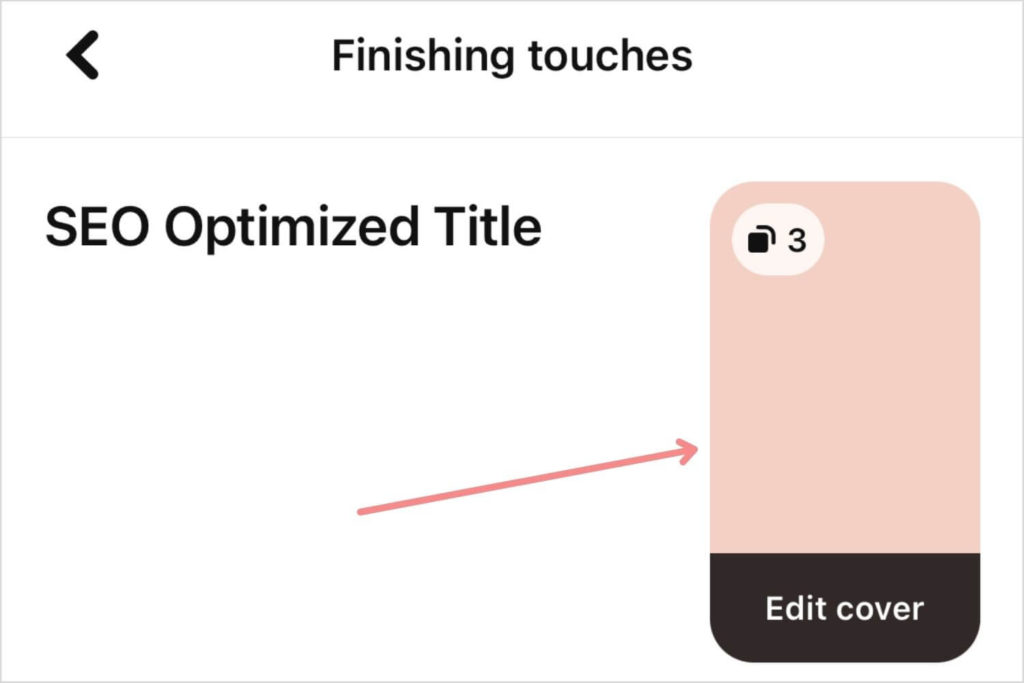
6. Change your pin cover
This is so important and you don’t want to forget it!
Edit your pin cover to choose what users will see when they come across the pin such as on your account. (In your feed, however, users will see the animation or video.)
This is especially important if you have a video or animation.
7. Publish!
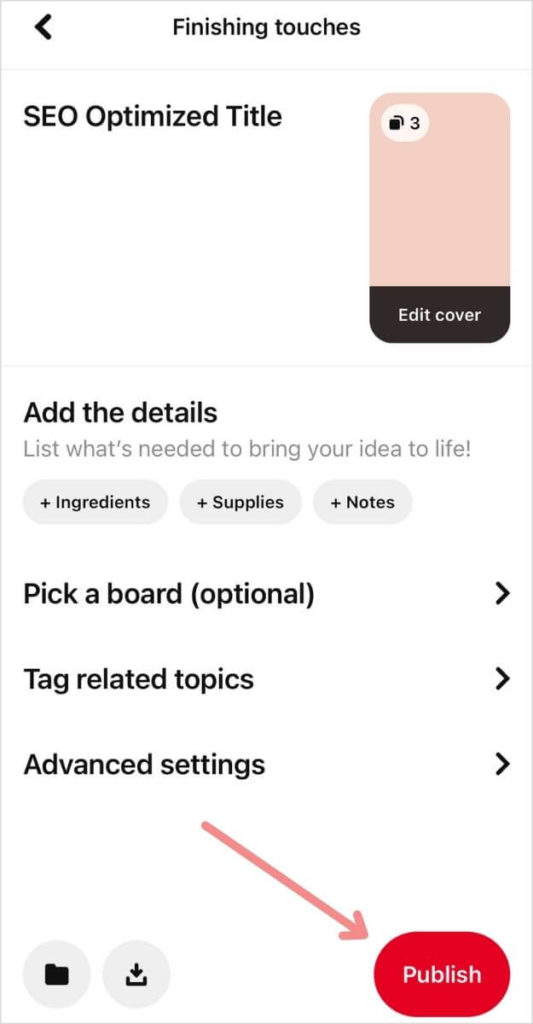
Once everything looks good, it’s time to publish!
Click the “Publish” button in the bottom right-hand corner of the screen to send your pin out to the world.
Related: Can You Schedule Idea Pins On Pinterest?
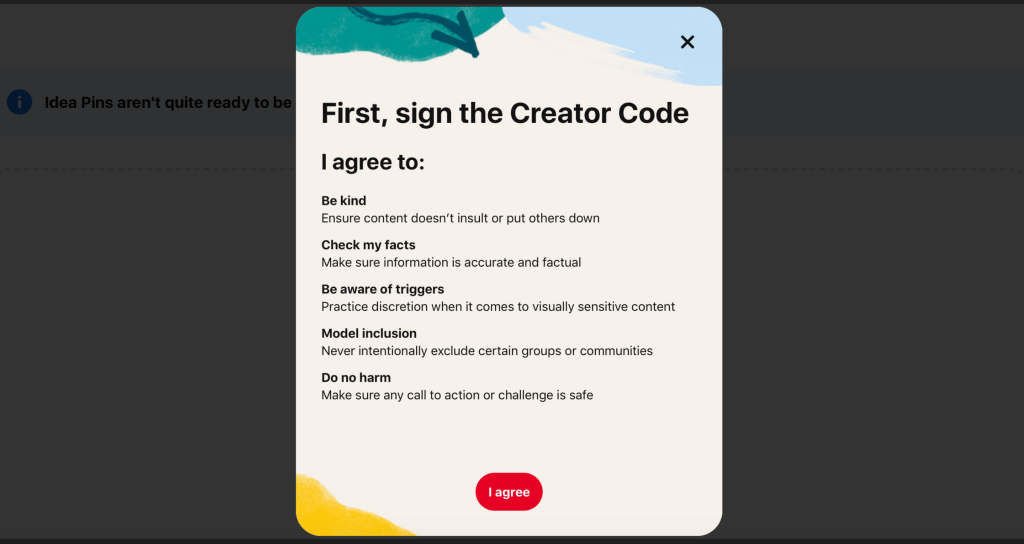
Please note: If this is your first Idea Pin, you may have to sign the Creator Code first.
My top Idea Pin tips
Idea Pins can really bring great results when you optimize them to their full potential.
Below, I’m going to list some of my top Idea Pin tips to hopefully help you to see great results!
If you want to see my full list of 20+ Idea Pin tips, be sure to read it here!
Plus, you can also read Pinterest’s Idea Pins creative best practices on this page.
- Add animations or video to the first page
This can make your pins POP in the feed and grab pinners’ attention! In a sea full of pins, you really need to make sure it’s your content that stands out.
If you are creating graphics in Canva like I sometimes do, I really like to take advantage of the “Animate” feature! Check out how to use the feature in this YouTube video.
- Be careful with TikToks and Instagram Reels
Don’t gloss over this! Pinterest wants original content. Plus, you have to be careful with copyrighted music or audio that may be on TikToks or Reels.
Remember: If you choose to post TikToks or Reels, try to crop out the watermark!
- Add the first comment
Adding the first comment to your Idea Pin is a great way to call action to your pin and your comments. Ask a thought-provoking question and encourage others to answer or ask questions!
You can even highlight your comment so it appears at the top so users will see it.
PS – Engaging with commenters and responding to comments can help you to build an audience!
PSS – Make sure your comments are ON! This is a great way to get more engagements on your pins, which is super important.
- Add keywords everywhere you can
Yes – you can do Pinterest SEO on Idea Pins.
Add keywords when possible to:
- Pin title
- Pin details (like the notes)
- Your text overlay
- Your pin images
- Tagged topics
- The board you pin to
Read my full 20+ step Pinterest SEO checklist for more tips on SEO optimizing on Pinterest, and never underestimate the power of good Pinterest board SEO!
Related: How To Get Viral Idea Pins On Pinterest (20+ Tips)
Conclusion
I hope that this post has helped you discover how to create Idea Pins on Pinterest!
If you have any questions, be sure to leave them in the comments below!
Plus, if you want more valuable Pinterest information so you can skyrocket your success, read more on my blog or join my email list (I provide some of my MOST VALUABLE INFORMATION to my email list!)
I hope to see you around again soon. Thanks for reading!
Talk to you soon,
Leah Marie
SAVE FOR LATER!
